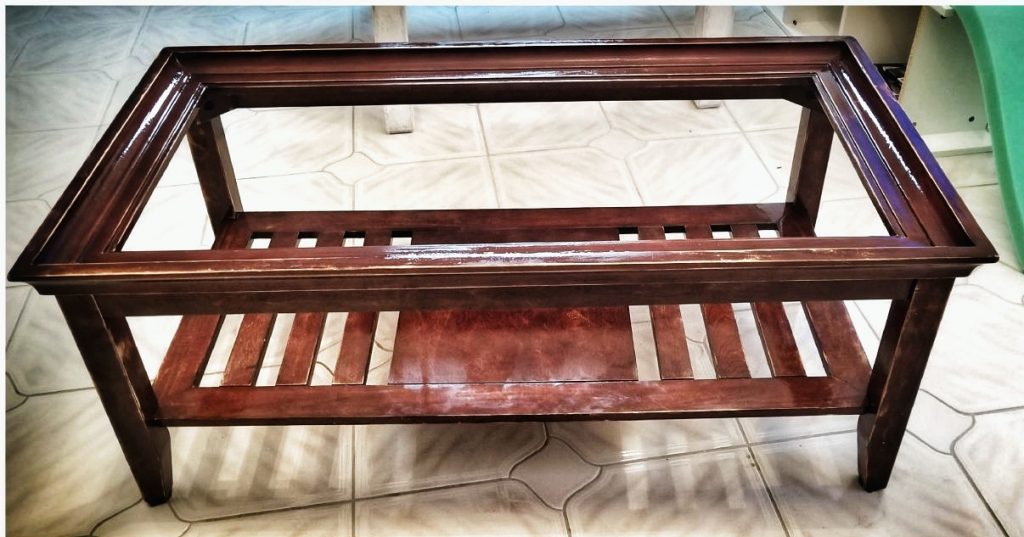
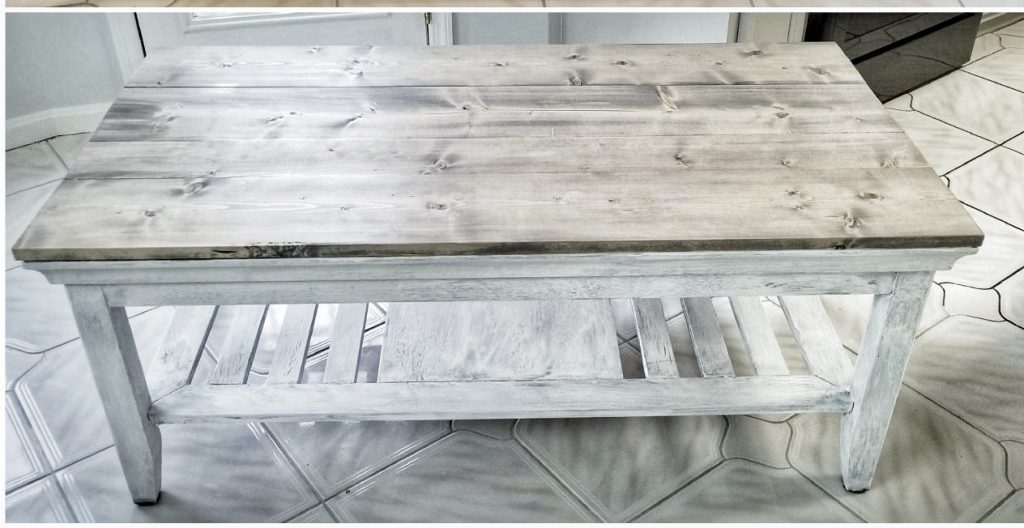
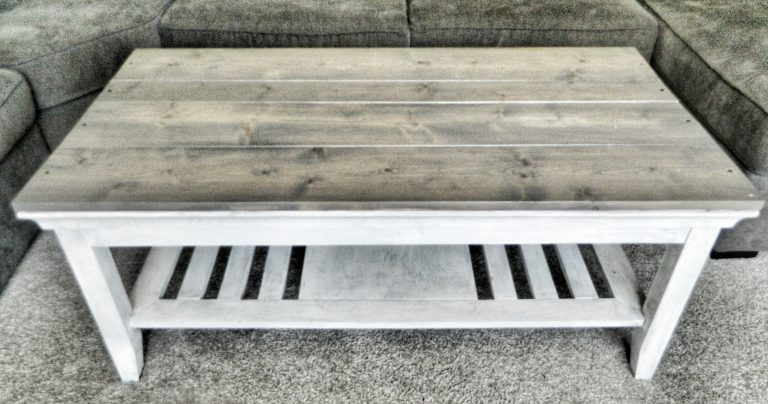
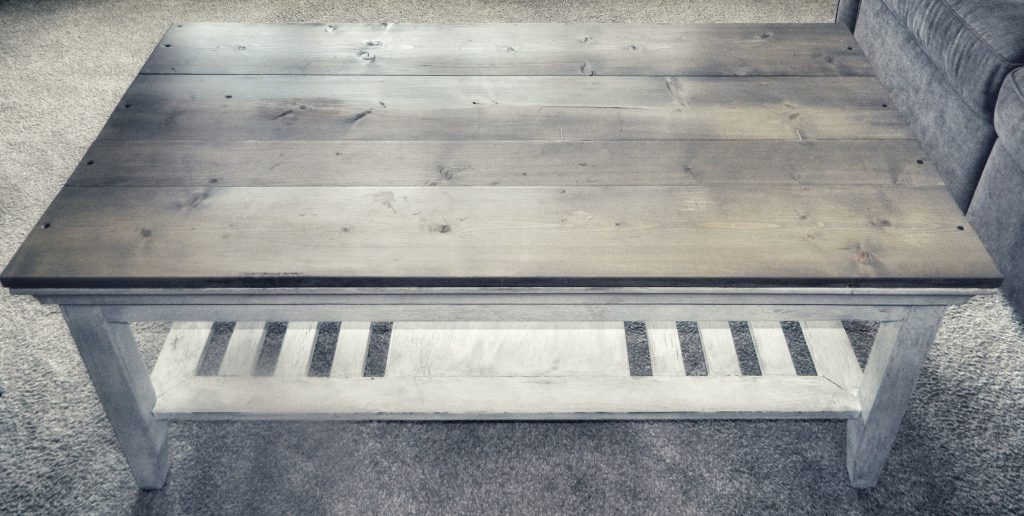
This furniture makeover is a great way to showcase the beautiful farmhouse style without breaking the bank. I got this coffee table from a Craig’s List ad for $25. It did come with a glass top but the glass was cracked and missing a piece. My perfectly imperfect makeover method allowed me to discard the glass and create my own tablet top! So find whatever old, beat-up, and cheap table speaks to you and let’s get to work!
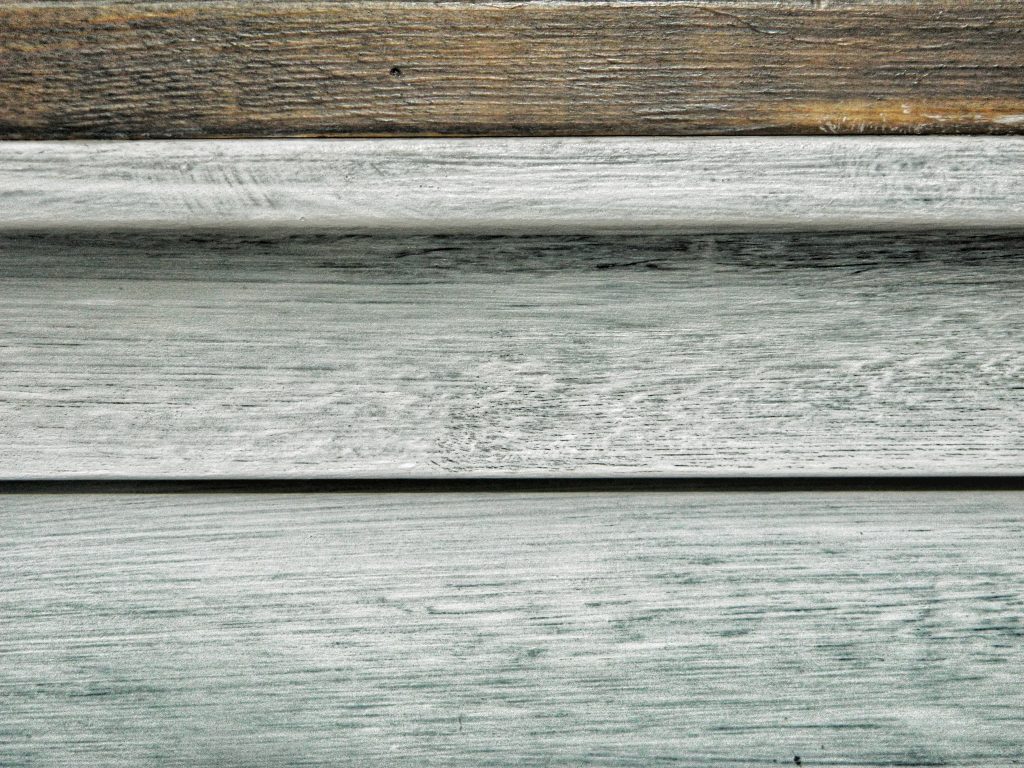
*These measurements are what I used for my table based on the table size. Make sure you measure the length and width of the top surface of the table you are redoing and find Common Boards in the lengths and widths you need in order to have at least 4 boards to cover the table top. It is cost efficient to get longer boards and have them cut to your needed length at the hardware store (which is a free service they provide). I needed to add a thinner board in order to cover the table top evenly – if you find that is necessary for you as well, just put that piece near the center. This look will also work with all thinner boards as well, so decide the look you want and get your measurements before heading to the hardware store.
**It seems superfluous that the last board I cut down was much longer than needed, but the price difference between the 6ft and 8ft boards are significant enough. I always can find a use for remnants!
INSTRUCTIONS
Measurethe length and width of the table top. Decided how many boards you want to use in order to choose the needed width of the boards.
Have the hardware store cuteach board to the needed lengths.
Sand all sides of each board, as well as the edges, until you can run your hand over without feeling anything sharp.
Wipe all surfaces of the boards with a dry rag to remove all dust.
Shake stain vigorously before opening the can to mix the colors. Brush the boards in long smooth strokes. Do top and sides as quickly and carefully as you can.
Take a clean rag and rubover the stain as you did with the brush, making sure to wipe off all stained areas (if color is too light for your taste, do another coat of stain and immediately wipe with a rag again).
Once those areas are dry, flip the board over and repeatStep 6 on the unstained side.
Let dry.
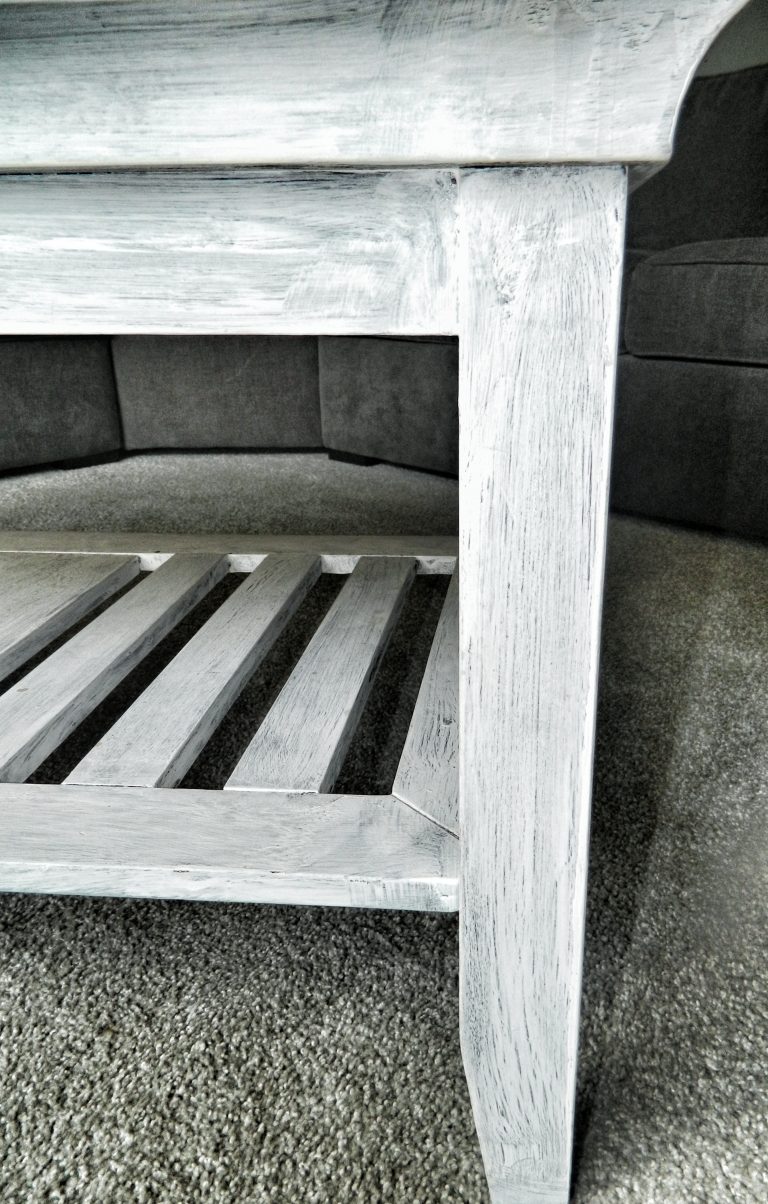
Apply a thick coat of the Crackle Glaze to the entire base of the table. It goes on clear so make sure you pay attentionand cover all the legs and sides.
Let dry.
Applyyour Chalky Paint. Use long even strokes with your brush to cover all the table’s base surfaces as you did with the Glaze. Make sure not to paint it on too thick, otherwise the crackle won’t come through enough.
Once the base is completely dry the crackling will be finished. You can speed up the process with a hair dryer on medium heat or a regular fan. (It may seem like the crackle isn’t working but be patient, it works as it dries).
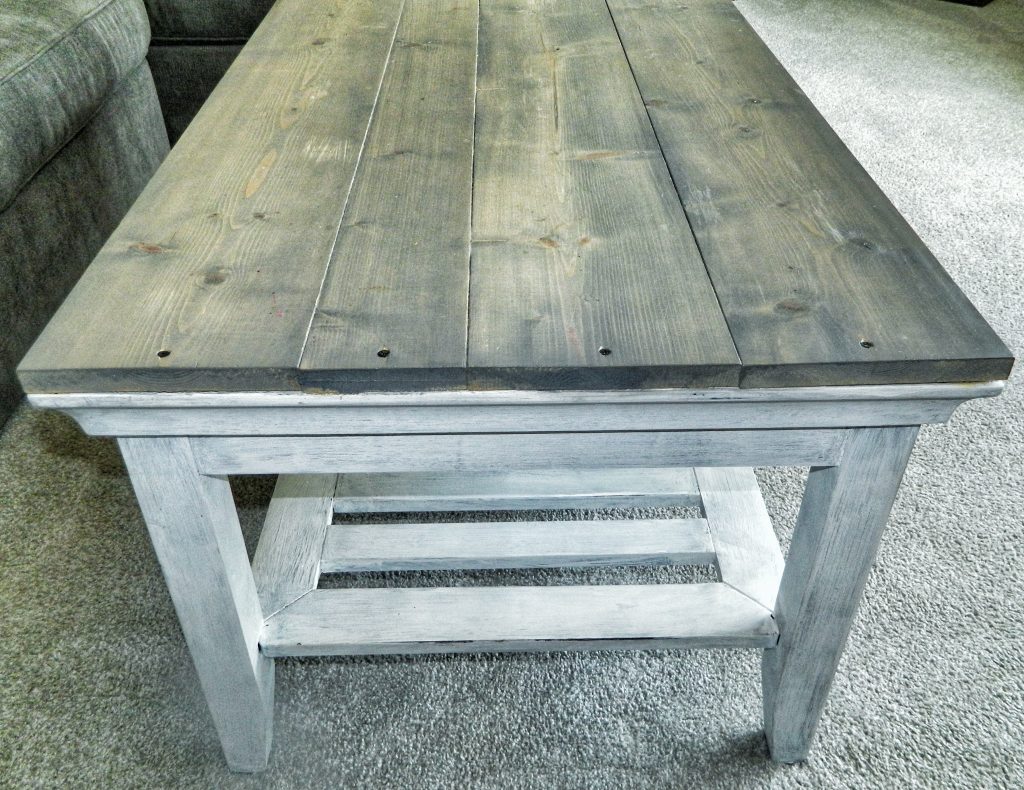
Line up the boards on top of the table in the positions you want them to be. Then separate each board enough to apply a thin strip of the Wood Glue to the side of the boards to secure them together.
Push the boards together with some force to keep them from moving.
Drill 1 screw into each board at both ends to completely secure each one to the table. Mine are about 1/2 in. from the edge since my table had only the edge to secure to.
Cover the entire table (top boards and crackled base) with the Polycrylic Top Coat. Use your brush and thickly coat with long smooth strokes.
Let dryand repeatStep 16 on the table top to protect the wood from water damage and other spills.
ENJOY your new and fabulous coffee table!
*Important Note*
The Crackle Glaze will crack the paint to reveal the color underneath. I did not use a base coat because the original color of the table’s wood was perfect to show through the white color I chose. If you want a different color to crackle through, choose a base coat paint in the color you want, and apply that FIRST. Once that paint is dry, apply the crackle, etc. Make sure the base coat is a dark color in order to create this look.
Did you try this project? Please share any comments or suggestions below!