
BY Elizabeth Scafuri
PUBLISHED 9/5/2019
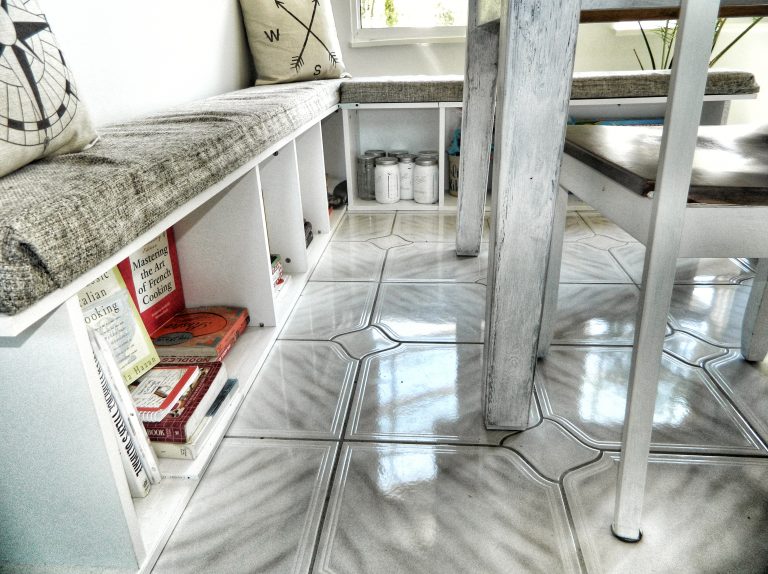
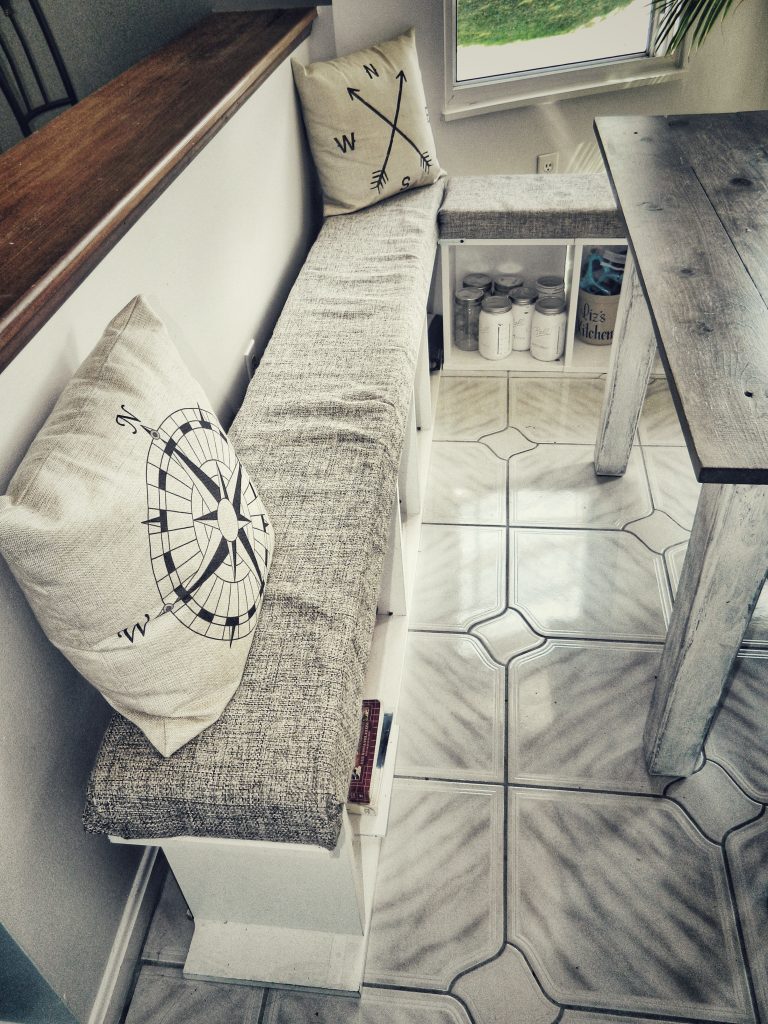
I have used this incredibly simple technique in 3 different rooms so far in my home. It does not require any type of skills, yet the end result is still fabulous. I have seen a lot of blogs with the same look, however, the majority of them show you how to literally build your own bench using tools, machinery, and serious knowledge of woodwork. This post involves a few easy steps to leave you with a fully functioning bench….with storage! It is the epitome of Perfectly Imperfect decor!
Materials/Tools
- 1 Billy Bookcase from Ikea (in white)*
- 1 1×12 in. Common Board (cut to the length of the bookcase)**
- 1 3 in. thick Foam Pad (cut to length and width of the bookcase)***
- 1 piece of Fabric****
- Adhesive Velcro Strips (Optional)
- White Tape (Optional)*****
- Staple Gun/Staples
- Scissors

* The Bookcase I have shown is the largest one Ikea offers. They also have a 3 shelf one if you have a small window. However, they offer an add-on piece that is the equivalent of 1 additional shelf so that way you can actually get any size you need.
** The width of the Bookcase “top” is 11 in. The 1×12 Boards are actually closer to 3/4×11.5 in. So I only had my Boards cut lengthwise and allow the Cushion to be slightly wider than the “Bench”. The hardware store will cut your piece for free so know the length of the Bookcase and have it cut to match that.
*** The Foam Pad usually comes with a 24 in. width. This will allow you to cut it in half and line the 2 halves along the Board to get the length you need, without having to buy a Pad twice as long or more than 1.
**** When choosing Fabric, make sure it is on the durable side if you plan on sitting on the bench quite often. Also, have them cut the Fabric to a length that will allow for the extra 3 in. depth all the way around. If you explain to the person cutting the Fabric what you are doing with it they should be able to help you choose exactly how much you need.
***** Once you have your shelves in place, you can cover up all the unused holes for adjusting the shelves with strips of white tape. This really makes the finished product look like a bench and no longer a bookcase
Instructions
- Measure the length of your window or wall to choose how long you want your bench to be.
- Build the Bookcase according to the IKEA instructions.
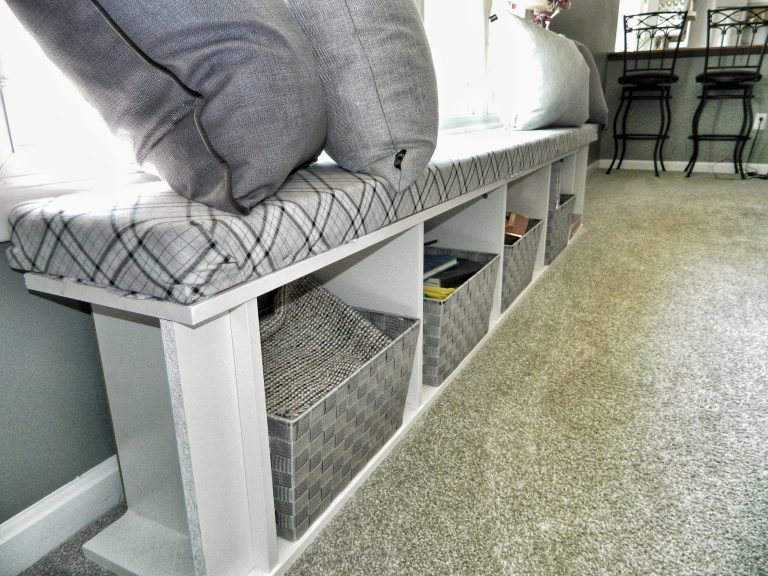
- Lay the Bookcase on its side. If you already have storage bins, slide the shelves into positions allowing enough space for your bins. (I usually do not use all the given shelves to give me more storage room). Otherwise slide them in wherever you want.
- Cut your Foam Pad in half (or to the width of the wood – about 11.5 in.) and cut it to the length of the wood/bookcase.
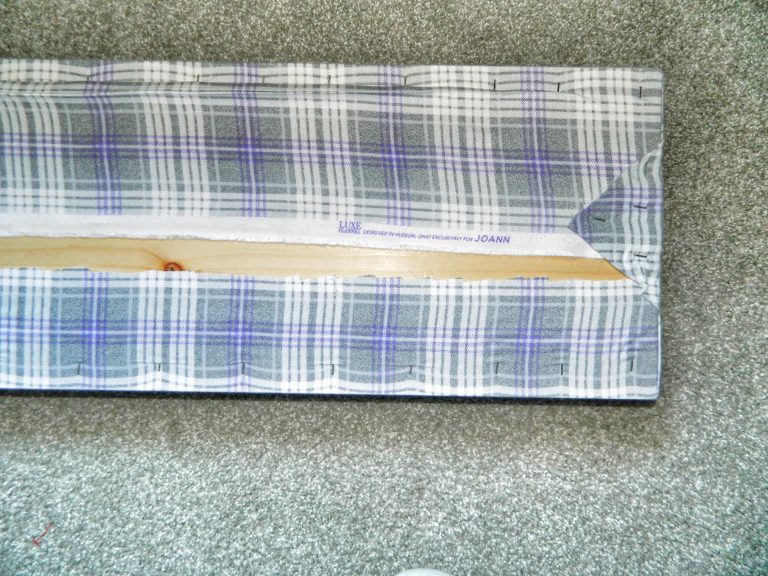
- Lay your Fabric upside down. Place the Foam on top and the Wood Board on top of the Foam so that it lines up.
- Slide the Foam and Board close to the edge of the Fabric – leaving enough to pull over the Foam and into the middle of the Board. Do this with 1 length and width of the Fabric.
- Start with 1 short edge of the Board and tightly pull the Fabric onto the Board and Staple it. (Use enough staples to completely secure the Fabric.) *I like to fold the Fabric on the short sides like I’m wrapping a gift – this creates a more polishes look. Keep folding and pulling tightly on the Fabric and Stapling until you have those 2 sides secure.
- Cut the excess Fabric from the other 2 sides, keeping enough to be able to pull it onto the middle of the Board like the other sides.
- Repeat STEP 7.
- If you want your cushion to be secured to the bookcase, Cut a few strips of the Velcro and place the sticky sides onto the Board and the Bookcase in the same locations so that the Velcro will stick together. That seat won’t slide at all! OR just place the Cushion onto the Bookcase so that everything lines up.
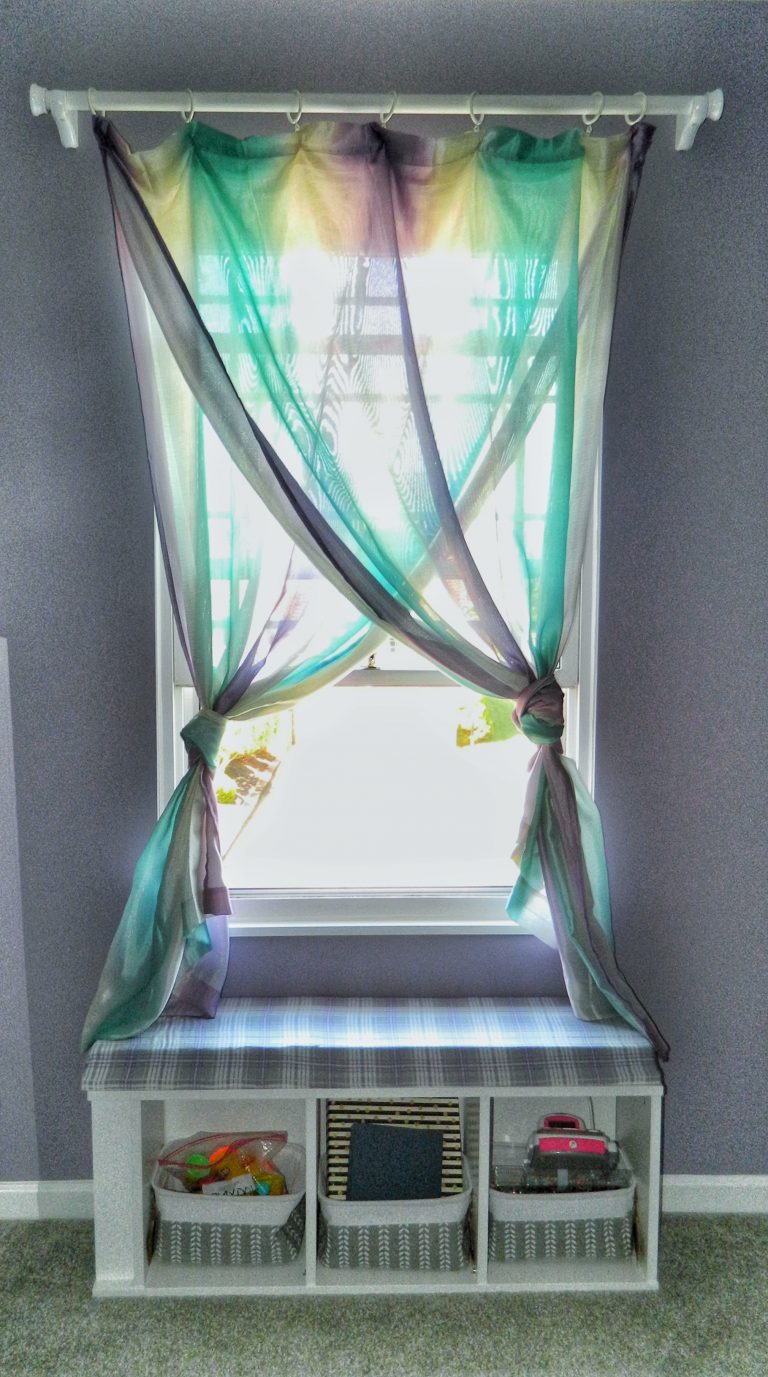
- ENJOY YOUR NEW STORAGE BENCH!!
Did you try this project? Please share and comments or suggestions below!